Introduction

I’m going to show you how to set up the AWS Marketplace Withywindle Stable Diffusion WebUI and use AI to generate your own images from text.

A picture of the AUTOMATIC1111 WebUI. In the prompt box it says, 'An apple sitting on a table in a farmhouse'. In the image box is a picture of apples on a table.

(Quickstart Instructions and additional usage notes can be found here).

Let’s get started.

Create an AWS Account: Go to the signup page in your browser and sign up for an AWS account.

Add a Payment Method to AWS

Before using AWS services, you'll need to add a payment method to your account. This is required for billing purposes and to subscribe to various services.

To add a payment method to your AWS account:

  1. Log in to your AWS Management Console.
  2. Click on your account name or the "Billing" dropdown.
  3. Select "Payment methods" or "Payment history".
  4. Follow the instructions to add a new payment method, such as a credit card or bank account.

Create a Key Pair

  1. In the AWS Management Console, search for "Key Pair" and click on "Key Pairs".
  2. Create a new key pair by clicking "Create Key Pair" at the top right.
  3. Provide a name for the key pair and click "Create Key Pair".
  4. The private key (.pem file) will be downloaded to your computer. Learn More

Launch the Instance

  1. Go to https://aws.amazon.com/marketplace/pp/prodview-3ku4tg76wnt2m
  2. Subscribe to the listing and accept the terms of service.
  3. Once the option appears, click "Continue to Configuration" on the top right.
  4. Change the region to the one closest to you and then click "Continue to launch".

Retrieve the Instance's IP and Instance ID

After the instance is launched, find its Public IPv4 address and InstanceID by navigating to the EC2 Console and clicking on the instance in 'EC2 Instances'.

NAN

Create a DNS Record

  1. In the AWS Management Console, go to Hosted Zones under Route 53.
  2. Click on your DNS and then click "Create Record".
  3. Set the Record Name as how you want to connect to your instance (e.g., "stableDiffusion.example.com").
  4. Put the instance's IP address into the 'Value' box. Click “Create Record” to save it.
NAN

Configure Security Group Rules

  1. In the AWS Management Console, go to your instance and click on "Security".
  2. Edit the inbound rules and add two inbound rules. One allowing 0.0.0.0/0 to HTTP and another allowing your IP to HTTPS.
  3. Click “Save rules”.
NAN

SSH into Your Instance

  1. In your terminal, use the command:
  2. ssh -i ~/.ssh/coolkey.pem ubuntu@<YOUR_INSTANCE_IP>
  3. Then type "yes" to continue.

Configure secure HTTP

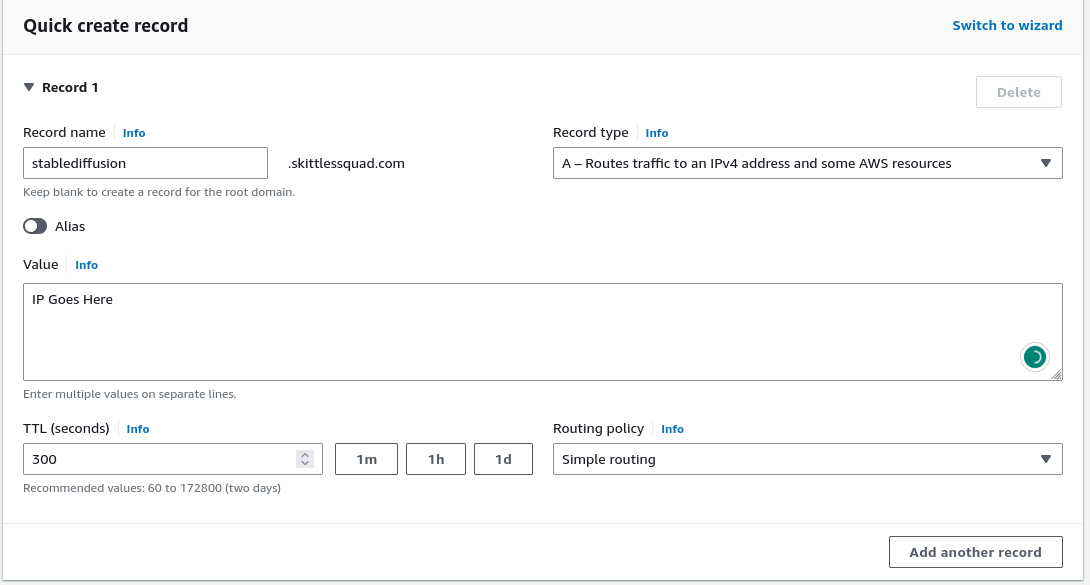
Execute the certbot script to generate a secure certificate using the command:

cd bin; certbot-init.sh <stablediffusion.example.com>

Remember to replace domain.example.com with your domain

Log in to the Web UI

  1. Visit the website in your browser (e.g., https://stablediffusion.example.com).
  2. Log in with the user name sd_webui and password the same as the instance-id.
  3. You can find your Instance ID the same way you found your Instance’s IPv4 address.
NAN

Now you can generate your first image!

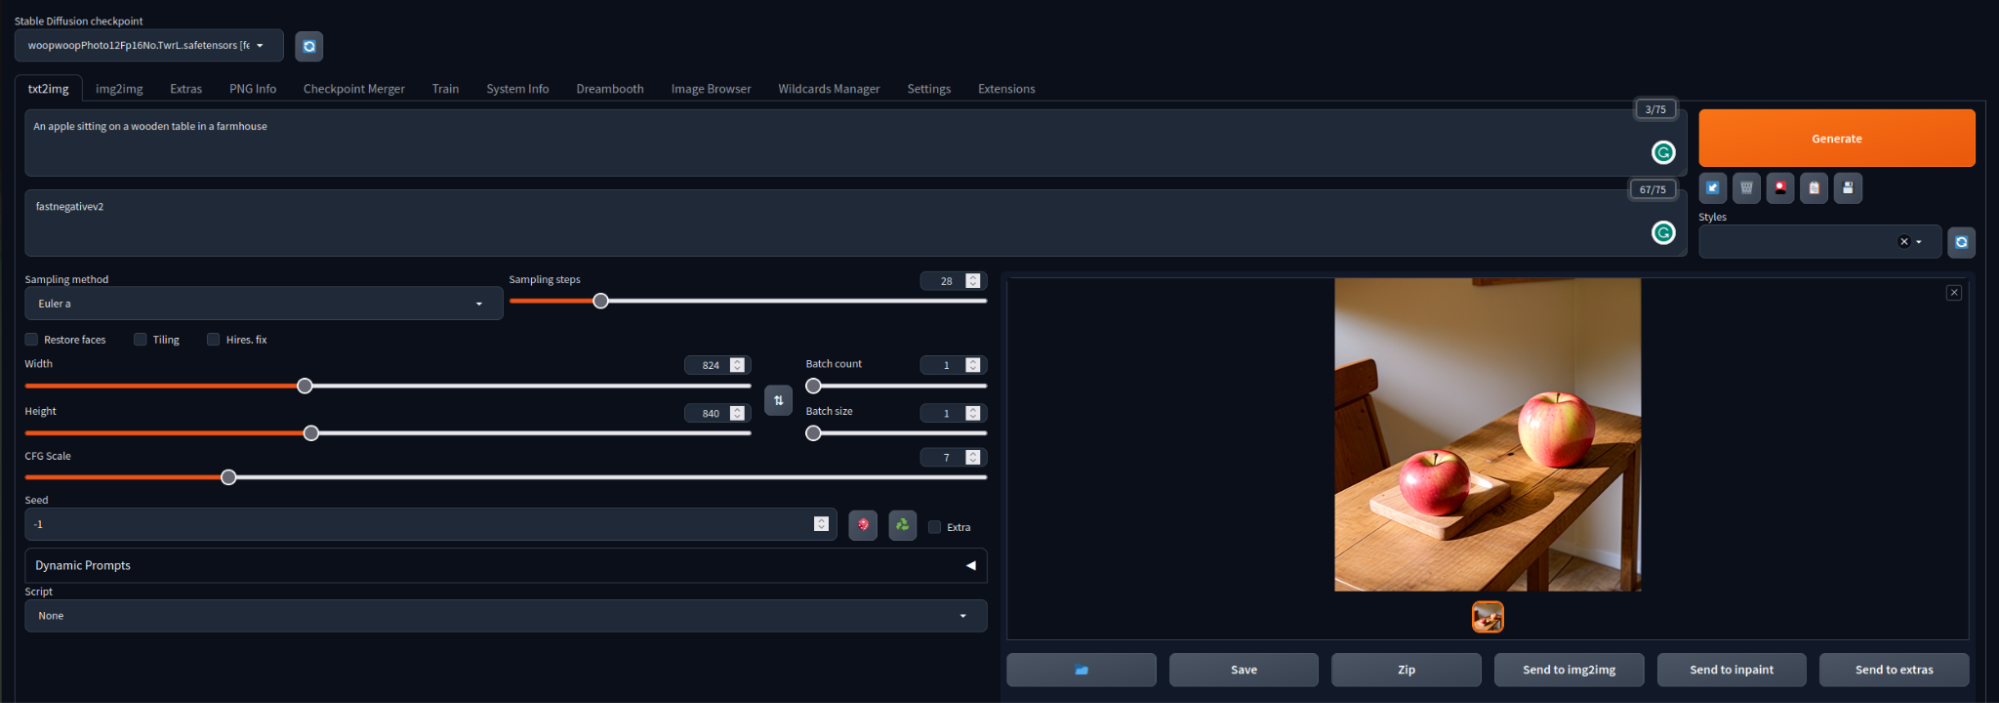
Write a description of the image you would like to generate in the 'prompt' input box and click 'Generate'. Your image will appear in the box on the left in a few seconds.

NAN

Troubleshooting:

If the web UI is not available immediately after the steps, please be patient (wait for at least 20 minutes). If it still doesn't work, consider rebooting the instance with sudo reboot

For more guidance on how to manage and configure Stable Diffusion using the WebUI please visit the AUTOMATIC111 community wiki.